Erase an External Hard Drive Before Disposal: Because Tech Recyclables are World Travellers
You can use ShredIt X to erase an External Hard Drive before disposal. In fact, we strongly recommend that you erase all the data you don’t want the next user to be able to recover. And there’s a good reason for this.
Many cities accept old hard drives at their recycling depot and dispose of them as scrap, much of which is sent overseas to be recycled. Since you don’t know who will have access to your drive, it’s a safe practice to erase an External Hard Drive before disposal. You’ll sleep easier knowing that, like an security professional, you didn’t take chances where recovery of your private data by someone you don’t even know could easily be avoided.
Before you Erase an External Hard Drive, Read this!
Erase what’s already Deleted from an External Hard Drive: Even Easier
If you have an External Hard Drive you’re using for backup and want to erase what you’ve already deleted, it’s even easier. To Clean as you go, Erase Disk Free Space. Now you’re thinking like a Security Professional.
Warning: Read this before Continuing
Read all of these instructions before continuing. When you use the Hard Drive Eraser function of ShredIt, you will erase all the data on the drive, (i.e. all your files), wiping it so it can’t be recovered. Therefore, before you erase a drive, make a backup copy of any data you want to keep before you erase the drive, because the files cannot be recovered from the drive after the drive has been erased. Seriously.
Physical Destruction: The Old-Fashioned way
The other method of making sure that sensitive data can’t be recovered from an external drive is to physically destroy the hard drive. This can be quite difficult since most hard drives are fairly robust. It’s also messy so wrap the hard drive well in multiple layers of plastic before you take a hammer to it to prevent sharp pieces flying into your face. Breaking the drive apart also means you won’t be able to recycle it.
Instructions: How to Erase an External Mac Hard Drive
To erase an External Hard Drive on Mac, follow these easy steps:
- Install ShredIt X
If you haven’t already done so, install ShredIt X.
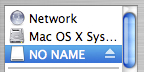
- Mount the Drive.
Mount the External Drive you want to erase. Once mounted, it will appear on the drive menu of the finder.

- BackUp if required.
Copy all the files you want to keep from the external hard drive onto another Drive. Once the External Hard Drive is erased, the files cannot be recovered.
- Delete all files on the External Hard Drive.
After you have made a copy of all the files you want to keep, move everything remaining on the External Hard Drive to the trash.
Then, Empty the trash. - Shred the Disk Free Space.
Shred the disk free space on the external Hard Drive. There are three ways to erase free space using ShredIt X.
Using Drag and Drop.
Drag and Drop the External Hard Drive icon onto ShredIt X.
or
Using the Buttons.
Double-click the ShredIt X Icon to start the app. Click the “Shred Freespace” button on the main dialog.
From the “Open” Dialog, pick the Drive you want to erase (the External Drive)
or
Using the Menu.
Double-click the ShredIt X Icon to start the app.
From the “Freespace” Menu Item, Pick the drive you want to shred (the External Drive).
Because this procedure will overwrite your entire External Hard Drive, you can expect it to take some time, depending both on the size of your External Hard Drive and the number of overwrites you have specified.
ShredIt X Help
- Read the FAQ
- Go to the ShredIt X Tutorials
- Read the ShredIt X Documentation
- Refer to the ShredIt X Specifications and System Requirements
- Download ShredIt X
- Can’t find what you’re looking for? Contact Support
Take the Next Step to Protect your Privacy
Get It Now
Get it now
$24.95 US
Download Trial
Download
Free Trial