- How to Erase Free Space
- How to Erase Previously Deleted Files
- How to use the Scheduled Free Space Shredding feature
Use this procedure to secure delete free space on a hard drive so the data can’t be recovered. Disk free space is the area on your hard drive containing de-allocated memory. This is where all the data you have previously deleted is stored, until it is overwritten by something else.
- To erase the data you have previously deleted, you need to shred disk free space. If you have a lot of disk free space or a slow hard drive, shredding free space can take a while.
- Once you have shredded the data you have previously deleted, all your confidential trash has been securely disposed of. After that, to ensure that all future confidential documents are secure deleted, drag them to ShredIt shredder, not to the Trash icon. (See: How to shred a file) If you accidentally put a confidential document into the trash, and empty the trash, then you need to shred the free space again to securely delete it.
- If you shred the free space on a disk by mistake, don’t panic. Using this procedure will only shred your free space, not your data. We’ve made it easy to shred the free space of a disk and more difficult to shred the contents of a disk. This is intentional, so that you don’t accidentally shred the contents of a disk (i.e. your data).
- There’s an important difference between the technical terms “delete” and “secure delete”. The technical computer term “delete” refers to the type of computer function where the data is marked as deleted, but not really gone. The technical term “secure delete” refers to the type of computer function where the data is overwritten by other characters so the data can’t be recovered. “Secure Delete” is also referred to as “clean”, “wipe”, “erase” and “shred”. If you need more information about Secure Delete, read “Secure Delete versus Delete – What’s the difference?“
Requirements:
- ShredIt X – Mac OS X
Instructions: How to Erase Free Space
There are three ways to erase free space using ShredIt X.
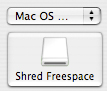
- Using Drag and Drop. Drag the Hard Drive icon onto the ShredIt Icon and drop it

or
- Using the Buttons. Double-click the ShredIt X Icon to start the app. Click the “Shred Freespace” button on the main dialog. From the “Open” Dialog, pick the drive you want to erase the free space for.
or
- Using the Menu. Double-click the ShredIt X Icon to start the app, and then pick the drive you want to shred using the “File” Menu .
Instructions: How to Erase Previously Deleted Files
You can use ShredIt to erase data you’ve already deleted. You might want to do this if:
- You’ve moved confidential files to the trash can and emptied the trash
- You’ve used the delete function in your email program to delete email, that email is no longer in the email trash can and you want to erase the email instead
- You’ve used a “clear cache”, “erase history”, “clear history” or “clear private data” function in your web browser and you now want to erase your cache or history instead
- Your browser has already deleted your internet cache, internet history or other internet tracks and you would like to erase them instead
Disk free space is the area on your hard drive containing de-allocated memory. This is where all the data you have previously deleted is stored, until it is overwritten by something else. If you have a lot of disk free space or a slow hard drive, shredding free space can take a while.
- If you shred the free space on a disk by mistake, don’t panic. Using this procedure will only shred your free space, not your data. We’ve made it easy to shred the free space of a disk and more difficult to shred the contents of a disk. This is intentional, so that you don’t accidentally shred the contents of a disk (i.e. your data).
To erase the data you have previously deleted, you need to shred disk free space.
Instructions: How to use the scheduled free space shredding features
The easiest way to ensure that you have erased all confidential data that you have disposed of is to shred your disk free space on a regular basis. You can configure ShredIt X to do this automatically, on whatever schedule you prefer.
- Shredding disk free space, especially on a large drive, may take quite a long time.
- Your computer must be running and not asleep in order for Scheduled Free Space Shredding to run, so make sure not to schedule free space shredding at a time when the computer is sleeping or has been shutdown.
- If you shred the free space on a disk by mistake, don’t panic. Using this procedure will only shred your free space, not your data. We’ve made it easy to shred the free space of a disk and more difficult to shred the contents
- Configure the schedule. From the “ShredIt X” menu, select “Preferences” and click on the “Freespace Schedule” tab. Pick the disk and the scheduled time for shredding. For further information on updating the preferences, refer to the “How to Install ShredIt X” section of the ShredIt X ReadMe (pdf)
- Once you have configured the schedule preferences, ShredIt X will shred the free space of the selected disk(s), provided the following conditions are met:
- ShredIt X is running and
- Your computer is both running and not asleep and
- If you are running scheduled free space shredding on an external drive, it also must be both connected and mounted on the desktop

ShredIt X Help
- Read the FAQ
- Go to the ShredIt X Tutorials
- Read the ShredIt X Documentation
- Refer to the ShredIt X Specifications and System Requirements
- Download ShredIt X
- Can’t find what you’re looking for? Contact Support
Take the Next Step to Protect your Privacy
Get It Now
Get it now
$24.95 US
Download Trial
Download
Free Trial