Instructions: How to Install NetShred X
- Drag the NetShred X folder to wherever you keep application software.

click to enlarge - Double click the NetShred X icon to launch the app.
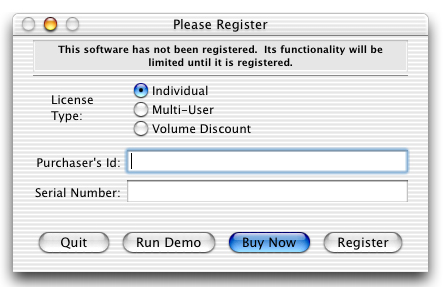
- The Registration dialog will appear when you launch the app:
click to enlarge - To register, enter the Purchaser’s ID and Serial Number supplied when you bought the app and click the “Register” Button.
- The easiest way to do this is to copy (Ctrl C) and paste (Ctrl V) the information from the email we sent you.
- If you purchased a CD, the Serial Number/Registration Key is also on the CD jacket.
- If there is a problem with the registration information, the “Invalid Registration Information” dialog will appear. To correct the problem, refer to the “NetShred X FAQ”.
click to enlarge
- You’ve now completed the simple setup to have NetShred X run automatically. NetShred X will now do the following:
- Each time you quit from your email app or a browser, NetShred X will erase your Browser Cache, Mail Trash and TopSites. (You can change which tracks NetShred X will erase in the Preferences.)
- Before erasing, NetShred X will pop up a dialog box asking you to confirm that you want to erase your browsing data. To erase, click “OK”. (You can disable this confirmation dialog in the Preferences.)
- As soon as shredding has started, you can re-start your email or browser app.
- (Optional) You can tailor NetShred X’s behavior by modifying the following in the preferences:
- Change which internet tracks NetShred X will erase. (Use the Shred, Custom, PlugIn and HTML 5 Preferences Tabs)
- Enable Automatic Hiding (when finished), disable Confirmation, enable logging (Use the Control Preferences Tab)
- Change the Overwrite pattern and/or enable Government Standard compliance (Use the Control Preferences Tab)
- Change which email/browser apps are enabled or which profiles are enabled (NetShred X will erase for checked apps and profiles, but will not erase for unchecked apps and profiles)
- Stop NetShred X from erasing automatically (Use the Control Preferences Tab)
For further information, refer to the NetShred X Documentation


- (Optional)You can also run NetShred X manually (either in addition to or instead of running it automatically. To do so, use the buttons on the NetShred X Main Screen. For further information, refer to the NetShred X Documentation
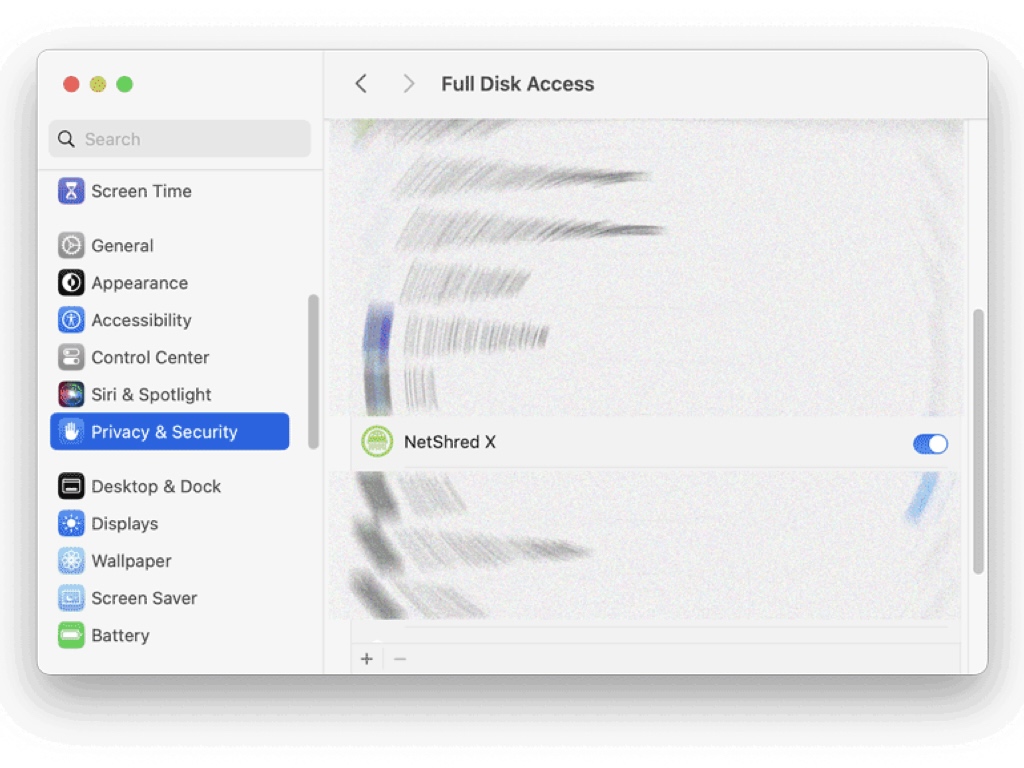
- On macOS X 10.14 Mojave or later, grant NetShred X Full Disk Access.
- Go to System Preferences > Security & Privacy > Privacy Tab
- From the left-hand menu, select “Full Disk Access“
- From the right-hand menu, click “NetShred X“.
click to enlarge
Instructions: How to Uninstall NetShred X
- Configure NetShred X to not run automatically
NetShred X>Preferences>Control Tab>Uncheck “Browser Watch” - Drag the preferences files to the Trash
“$HOME/Library/Preferences/com.mireth.netshred.plist” - Move the NetShred X folder from the Applications folder to the Trash.
- If you’ve created an alias to NetShred X, move it to the Trash.
If you are running NetShred X from the Dock, drag it out of the Dock. - Empty the Trash.
NetShred X Help
- Read the FAQ
- Go to the NetShred Tutorials
- Read the NetShred Documentation
- Refer to the NetShred Specifications and System Requirements
- Download NetShred
- Can’t find what you’re looking for? Contact Support
Take the Next Step to Protect your Internet Privacy
Get NetShred X Now
Get it now
$24.95 US