How to Erase a Hard Drive on Mac
Before disposing of a computer, we recommend that you erase all the data you don’t want the next user to be able to recover. Many cities accept old computers at their recycling depot and dispose of them as scrap. Since you don’t know who will have access to your computer after it has left your possession, it’s a safe practice to erase the hard drive before disposal. (If you want to learn more about the issue, read our Resources Page.)
Read all of these instructions before continuing. Using the Hard Drive Eraser function of ShredIt will erase your data, (i.e. your files), wiping the computer by overwriting your data so it can’t be recovered. Therefore, before you erase the hard drive, make a backup copy of any data or applications you want to use on another computer before you erase the contents of a drive, since the files cannot be recovered from the disk after it has been erased.
Note: The other method of ensuring that sensitive data can’t be recovered is to physically destroy the computer, but most of us don’t have the equipment to do this. Instead, if you have an older machine, we probably have a version of ShredIt that works on it, too. Click here to see all the versions of ShredIt. If you’re not sure what the issue
Requirements:
- ShredIt X – Mac OS X
- any Mac OS X desktop or laptop computer
Instructions: How to Erase a Hard Drive
- If you haven’t already done so, install ShredIt X.
- Move all the files you want to keep from the hard drive on to an external hard drive or to a USB Flash Drive.
- After you have moved all the files you want to keep, move anything remaining on the drive EXCEPT THE OPERATING SYSTEM to the trash.
Make sure you have moved all files that contain your data to the trash. After deleting all the obvious files, (documents, spreadsheets), look for other personal data. Pay particular attention to browsing data created while surfing the internet, your pictures, video files you’ve downloaded, data created by financial software. Empty the trash. - Shred the disk free space on the Hard Drive. There are three ways to erase free space using ShredIt X.
- Using Drag and Drop. Drag the Drive’s icon onto the ShredIt Icon and drop it

or
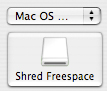
- Using the Buttons. Double-click the ShredIt X Icon to start the program. Click the “Shred Freespace” button on the main dialog. From the “Open” Dialog, pick the Drive you want to erase (the Hard Drive)
or
- Using the Menu. Double-click the ShredIt X Icon to start the program, and then pick the drive you want to shred (the Hard Drive) using the “Freespace” Menu.
ShredIt X Help
- Read the FAQ
- Go to the ShredIt X Tutorials
- Read the ShredIt X Documentation
- Refer to the ShredIt X Specifications and System Requirements
- Download ShredIt X
- Can’t find what you’re looking for? Contact Support
Take the Next Step to Protect your Privacy
Get It Now
Get it now
$24.95 US
Download Trial
Download
Free Trial