Why bother to wipe a USB Flash Drive Before Disposal? Because Tech Recyclables are World Travellers
A USB Flash Drive is the generic term for all those small data storage devices that connect to a computer directly through a USB port. USB Flash drives are often called a brand name such as key drive, thumb drive, jump drive, pen drive and, very generically, a USB stick. They are both Mac and Windows compatible. About the size of a pack of chewing gum, they are convenient to carry around. And that’s precisely the problem.
Because they’re so easy to transport, they’re always at risk of being lost, stolen, or forgotten about. So, give some thought to what’s on them. If that USB Flash Drive had confidential data on it that you’ve deleted but not erased, that data can still be recovered. To safeguard against this, wipe the free space on your Flash Drive after deleting confidential data. And before you dispose of a USB Flash Drive, wipe it’s contents.
Before you Wipe a USB Flash Drive, Read this!
Erase what’s already Deleted from a USB Flash Drive: Even Easier
If you have a USB Flash Drive that’s you’re still using and want to erase what you’ve already deleted, it’s even easier. To Clean as you go, Erase Disk Free Space. Now you’re thinking like a Security Professional.
Warning: Read this before Continuing
Read all of these instructions before continuing. When you wipe using ShredIt, you will erase all the data on the drive, (i.e. all your files), wiping it so it can’t be recovered. Therefore, before you wipe a Flash Drive, make a backup copy of any data you want to keep before you wipe because the files cannot be recovered from the drive after the drive has been wiped. Seriously.
Physical Destruction: The Old-Fashioned way
The other method of making sure that sensitive data can’t be recovered from USB Flash Drive is to physically destroy it. This can be quite difficult since they tend to be fairly robust. It’s also messy so wrap the Flash Drive well in multiple layers of plastic before you take a hammer to it to prevent sharp pieces flying into your face. And of course, breaking the drive apart also means you won’t be able to recycle it.
Instructions: How to Wipe a USB Flash Drive on Maac
To wipe a USB FlashDrive on Mac, follow these easy steps:
- Install ShredIt X
If you haven’t already done so, install ShredIt X.
- Plug in the USB Flash Drive.
Mount the Flash Drive by plugging it into any of your Mac’s USB ports. Once mounted, it will appear on the drive menu of the finder.

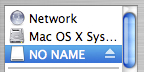
- Find the Name of the Flash Drive
Once mounted, the Flash Drive will appear on the drive menu of the finder. Make a note of the name so you know which drive to wipe.
- BackUp if required.
Copy all the files you want to keep from the Flash Drive onto another Drive. Once the Flash Drive is wiped, the files cannot be recovered.
- Delete all files on the Flash Drive.
After you have made a copy of all the files you want to keep, move everything remaining on the Flash Drive to the trash.
Then, Empty the trash. - Shred the Disk Free Space.
Shred the disk free space on the Flash Drive. There are three ways to erase free space using ShredIt X.
Using Drag and Drop.
Drag and Drop the Flash Drive icon onto ShredIt X.
or
Using the Buttons.
Double-click the ShredIt X Icon to start the app. Click the “Shred Freespace” button on the main dialog.
From the “Open” Dialog, pick the Drive you want to erase (the Flash Drive)
or
Using the Menu.
Double-click the ShredIt X Icon to start the app.
From the “Freespace” Menu Item, Pick the drive you want to shred (the Flash Drive).

Because this procedure will overwrite your entire Flash Drive, you can expect it to take some time, depending both on the size of your Flash Drive and the number of overwrites you have specified.
ShredIt X Help
- Read the FAQ
- Go to the ShredIt X Tutorials
- Read the ShredIt X Documentation
- Refer to the ShredIt X Specifications and System Requirements
- Download ShredIt X
- Can’t find what you’re looking for? Contact Support
Take the Next Step to Protect your Privacy
Get It Now
Get it now
$24.95 US
Download Trial
Download
Free Trial