- How to Erase a File
- How to Erase a Folder
- How to Safely erase an Alias
- How to Erase Files in the Trash
- How to Erase Browsing Data
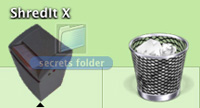
You can use ShredIt X as a file shredder to secure delete files and folders so the contents can’t be recovered.
- There’s an important difference between the technical terms “delete” and “secure delete”. The technical computer term “delete” refers to the type of computer function where the data is marked as deleted, but not really gone. The technical term “secure delete” refers to the type of computer function where the data is overwritten by other characters so the data can’t be recovered. “Secure Delete” is also referred to as “clean”, “wipe”, “erase” and “shred”. If you need more information about Secure Delete, read “Secure Delete versus Delete – What’s the difference?“
- ShredIt will not erase files/folders still sitting in the trash can. To shred these files, do one of the following:
- drag the file/folder out of the trash can and on to the ShredIt icon
- empty the trash can and then shred your disk free space, which could take a long time (see How to shred disk free space)
Requirements:
- ShredIt X – Mac
Instructions: How to Erase a File
There are three ways to erase a file using ShredIt X.
- Using Drag and Drop. Drag the file onto the ShredIt X Icon and drop it


or
- Using the Buttons. Double-click the ShredIt X Icon to start the app. Click the “Shred File” button on the main dialog. From the “Open” Dialog, pick the file you want to erase.
or
- Using the Menu. Double-click the ShredIt X Icon to start theapp, and then pick the file you want to shred using the “File” Menu .
Instructions: How to Erase a Folder
There are two ways to erase a folder using ShredIt X.
- Using Drag and Drop. Drag the folder onto the ShredIt X Icon and drop it
or
- Using the Buttons. Double-click the ShredIt X Icon to start the App. Click the “Shred Folder” button on the main dialog. From the “Open” Dialog, pick the folder you want to erase.

Instructions: How to Safely Erase an Alias
Don’t just shred an alias in the usual way. Here’s why.
When you shred an alias, ShredIt shreds the file the alias points to, not the alias file itself.
For example, let’s say you created an alias that pointed to your income tax file.
- If you drag the alias, “Income Tax File Alias” that you just created to the trash can, the alias “Income Tax file Alias” would be moved to the trash can, but the file it points to, “Income tax file” would remain where it was. That’s because the trash can is part of the operating system and that’s how the operating system handles alias files dragged on to the trash can.
- However, ShredIt is not part of the operating system – it’s an app. Apps don’t get the same information from the operating system as the trash can does because an app isn’t part of the operating system. When you drag an Alias file on to an application program, the operating system resolves the alias before passing the file name up to the application program. So if you dragged the “Income Tax File Alias” on to ShredIt, the operating system would resolve the alias and pass the name of the file the alias points to, “Income tax file” to ShredIt. ShredIt would then shred the “Income tax file”, just like you had just requested it to do.
- This is probably not what you wanted ShredIt to do. However, this is not unique to the ShredIt application. All applications on the Mac handle aliases this same way, since this no app is part of the operating system.
To erase an alias file safely, erase the “File” not the “Alias to the File”.
Instructions: How to Erase Files in the Trash
ShredIt will not erase files/folders still sitting in the trash can. To erase these files, do one of the following:
- drag the file/folder out of the trash can and on to the ShredIt icon
- empty the trash can and then shred your disk free space, which could take a long time (see How to shred disk free space)
Instructions: How to Erase Browsing Data
You can use ShredIt X to erase the browsing data (internet tracks) created when you surf the web and that haven’t been deleted yet.
To erase the internet tracks you’ve previously deleted, you’ll need to erase your free space.
To ensure that all of your current internet tracks are erased, not just deleted you need to run this procedure each time you quit from your browser.This would be quite cumbersome to do all the time. For a simple, automatic solution to the problem of erasing instead of deleting browsing, use NetShred X, the automatic Internet Track Eraser that will erase, not just delete cache, history, email and more.
ShredIt X Help
- Read the FAQ
- Go to the ShredIt X Tutorials
- Read the ShredIt X Documentation
- Refer to the ShredIt X Specifications and System Requirements
- Download ShredIt X
- Can’t find what you’re looking for? Contact Support
Take the Next Step to Protect your Privacy
Get It Now
Get it now
$24.95 US
Download Trial
Download
Free Trial